How to Connect a Custom Domain in Atomicat
Use this guide when you want an Atomicat site to load from your own domain, such as www.example.com, offers.example.com, or quiz.example.com.
The setup has three parts: configure DNS at your domain provider, wait for DNS propagation, and then connect and verify the domain inside Atomicat.
Before You Start
Make sure you have:
- A domain that you own.
- Access to the domain provider or DNS manager, such as GoDaddy, Hostinger, Namecheap, Cloudflare, Bluehost, or another provider.
- The DNS values shown by Atomicat.
- A clear decision about whether you are connecting a root domain or a subdomain.
DNS records are edited at your domain provider, not inside Atomicat. Atomicat verifies the records after they are public.
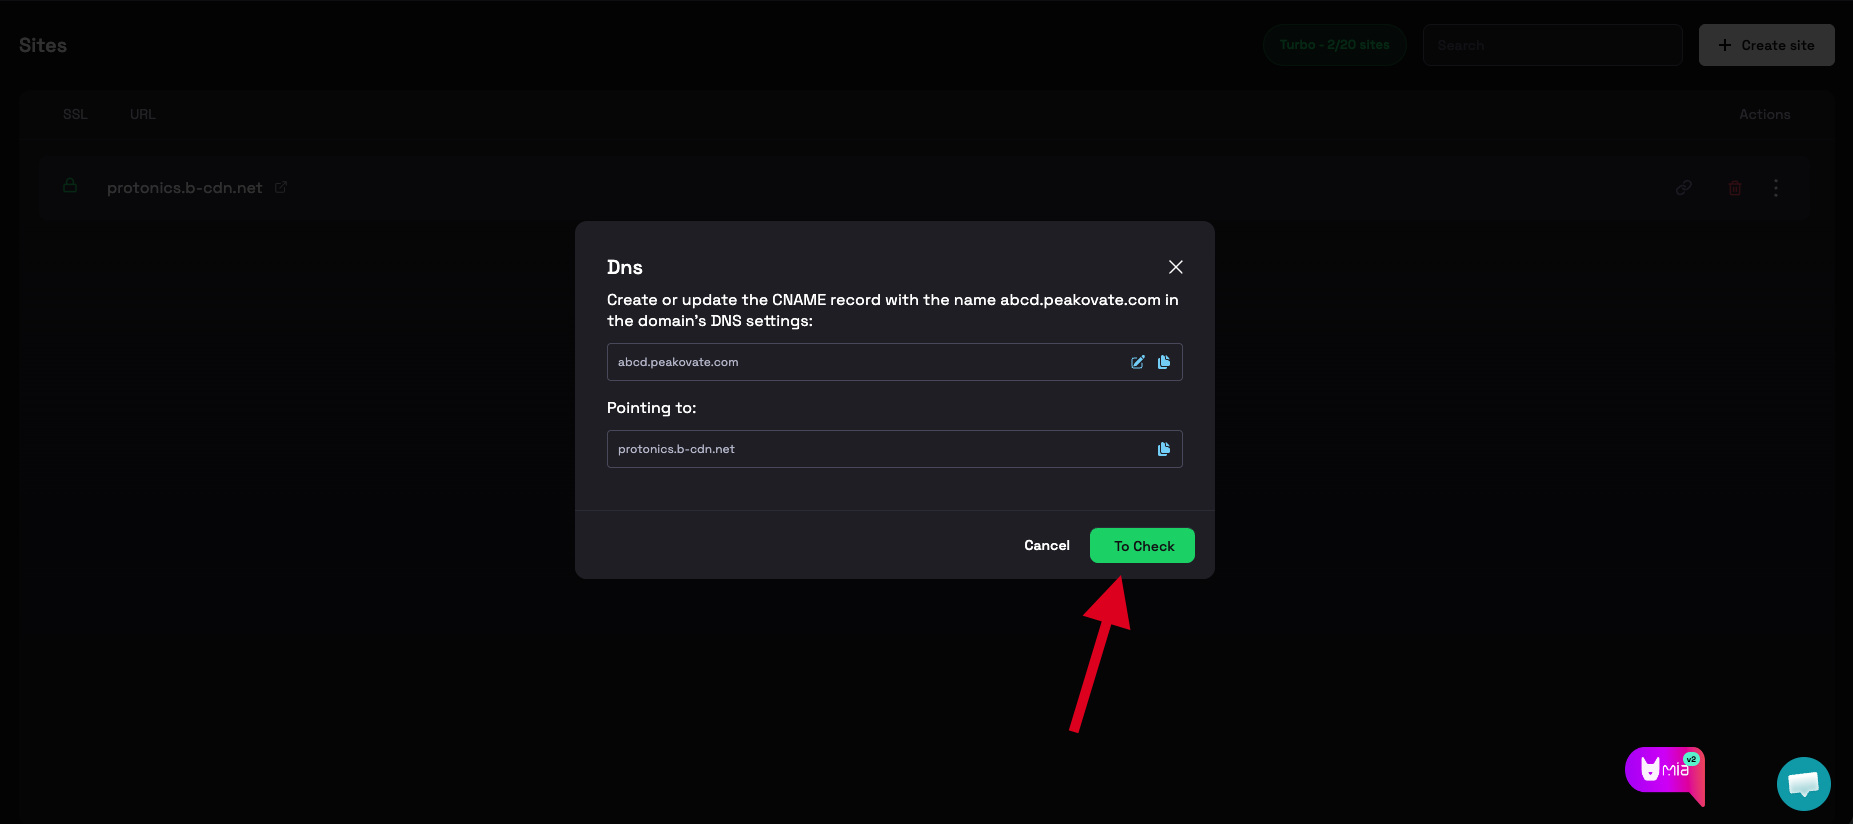
Step 1: Configure DNS Records
Open your domain provider and go to the DNS management area. This section may be called DNS, Manage DNS, DNS Zone, Advanced DNS, or Zone Editor.
Add the records shown by Atomicat. Depending on your setup, Atomicat may ask for one or more of these:
- A record
- CNAME record
- Nameserver update
Copy the record type, host/name, and value exactly as Atomicat shows them. If there is an older record for the same host, remove or update the conflicting record so the host only points to the correct Atomicat destination.
DNS Guides by Provider
Use your provider's DNS documentation if you are unsure where to add the records:
- GoDaddy — connect a domain to Atomicat
- Hostinger — connect a domain to Atomicat
- HostGator — connect a domain to Atomicat
- GoDaddy DNS Management Guide
- Hostinger DNS Zone Guide
- Namecheap DNS Setup Guide
- Cloudflare DNS Records Guide
- Bluehost DNS Management Guide
Step 2: Wait for DNS Propagation
After you save DNS changes, the records need time to propagate across the internet.
Propagation can take:
- A few minutes.
- Several hours.
- Up to 24 hours in some cases.
You can check public propagation with DNS Checker. Use the same record type and host that Atomicat asked you to configure.
Domain Format Requirements
The domain format matters. Atomicat does not automatically add www for root domains.
Root Domains
When connecting a root domain, enter the www version in Atomicat.
Correct:
www.example.com
Incorrect:
example.com
Subdomains
When connecting a subdomain, do not add www.
Correct:
blog.example.com
offers.example.com
quiz.example.com
Incorrect:
www.blog.example.com
Subdomains should be entered exactly as they were created in your DNS settings.
Common Domain Format Mistakes
| Situation | Incorrect | Correct |
|---|---|---|
| Root domain | example.com | www.example.com |
| Subdomain | www.blog.example.com | blog.example.com |
If the format is wrong, Atomicat may not be able to verify the domain even when the DNS record exists.
Step 3: Connect the Domain in Atomicat
- Log in to your Atomicat account.
- Open Sites.
- Find the site where the domain should be connected.
- Click the link icon next to the site name.

Atomicat opens the custom domain popup. Enter the domain using the correct format:
- Use
www.example.comfor a root domain. - Use
blog.example.com,offers.example.com, or another exact subdomain withoutwww.
After entering the domain, click Connect.

Atomicat then shows a verification popup. Review the current Atomicat domain and the custom domain you want to connect. If the domain is correct and the DNS requirements are in place, click Verify.
When verification succeeds, the domain is connected to the selected Atomicat site.
Troubleshooting
Domain Is Not Verifying
Check the following:
- The DNS records match the values shown by Atomicat.
- DNS propagation has completed.
- The domain was entered without
https://, paths, or query parameters. - Root domains use
www, such aswww.example.com. - Subdomains do not use
www, such asoffers.example.com. - There are no conflicting DNS records for the same host.
Domain Shows an Error After DNS Propagation
If DNS Checker shows the record has propagated but Atomicat still shows an error:
- Take a screenshot of the Atomicat error.
- Save a screenshot or link from DNS Checker.
- Contact Atomicat Support.
- Include the domain name, the Atomicat error, and the DNS Checker result.
Outcome
After DNS propagation and successful verification:
- The custom domain is connected to Atomicat.
- The site can be accessed through the configured domain.
- You can publish Atomicat pages to that domain.
Related Docs
- Connect a domain (GoDaddy)
- Connect a domain (Hostinger)
- Connect a domain (HostGator)
- Create a site
- DNS records
- Connect a domain
- Publish a page
FAQ
Do I configure DNS inside Atomicat?
No. DNS records must be added in your domain provider or DNS manager. Atomicat verifies the records after they are public.
Should I enter example.com or www.example.com?
For a root domain, enter the www version, such as www.example.com. Atomicat no longer adds www automatically.
Should I add www to a subdomain?
No. Enter subdomains exactly as they exist in DNS, such as blog.example.com or offers.example.com.
How long does DNS propagation take?
DNS can update within minutes, but some providers may take several hours or up to 24 hours.