How to Apply Video Delay in Atomicat
Video Delay lets you hide buttons, offers, pricing blocks, testimonials, sections, or other page elements until a specific moment. It is commonly used on VSL pages when you want the call to action to appear only after viewers have watched enough of the presentation.
Atomicat supports two delay behaviors:
- Page Delay: reveals elements after a set amount of time from page load.
- Video-Synced Delay: reveals elements based on the viewer's video playback progress.
Before You Start
Make sure you know:
- Which page will use the delay.
- Which video should control the delay, if the delay needs to follow video playback.
- Which elements should stay hidden at first.
- The exact time when the hidden elements should appear.
Use this format for delay time:
HH:MM:SS
Examples:
00:01:30means 1 minute and 30 seconds.00:05:00means 5 minutes.00:10:15means 10 minutes and 15 seconds.
Step 1: Configure Page Delay Settings
Open the page in the Atomicat Builder, then open Settings from the left sidebar. In the page settings, go to the Delay section and enter the time when delayed content should appear.
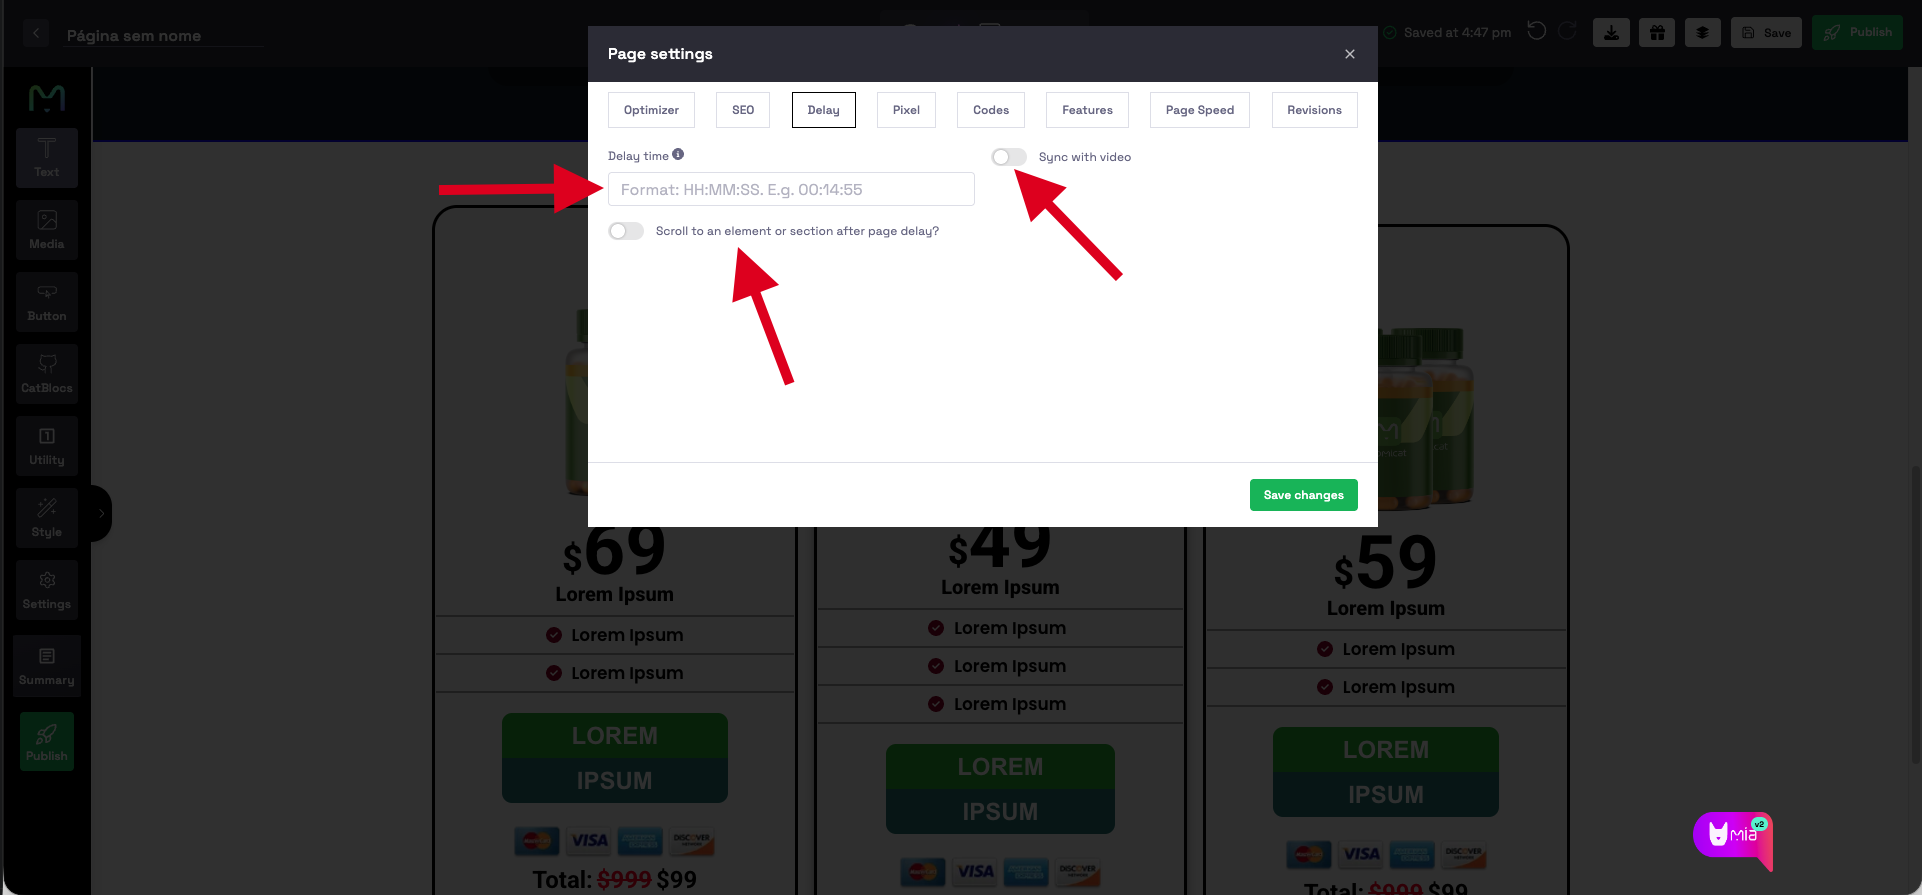
This is where you define the main delay for the page. You can also enable Sync with Video if the reveal should depend on video progress instead of page-load time.
Step 2: Choose the Delay Type
Choose the delay behavior based on how the page should work.
Standard Page Delay
Use standard page delay when the countdown should start as soon as the visitor lands on the page.
- Keep Sync with Video disabled.
- Enter the delay time.
- Save the page settings.
For example, if the delay is 00:03:00, delayed elements appear 3 minutes after the visitor opens the page.
Video-Synced Delay
Use video-synced delay when the reveal should match the viewer's progress in the video.
- Enable Sync with Video in the page delay settings.
- Enter the delay time.
- Save the page settings.
For example, if the delay is 00:03:00, delayed elements appear when the viewer reaches 3 minutes in the video.
Only one video can control video-synced delay on a page. If the page has multiple videos, choose the single video that should control the delayed elements and enable Delay only on that video.
Step 3: Enable Delay on the Video
If you are using video-synced delay, select the video element on the page. Open the video settings and enable the Delay option.
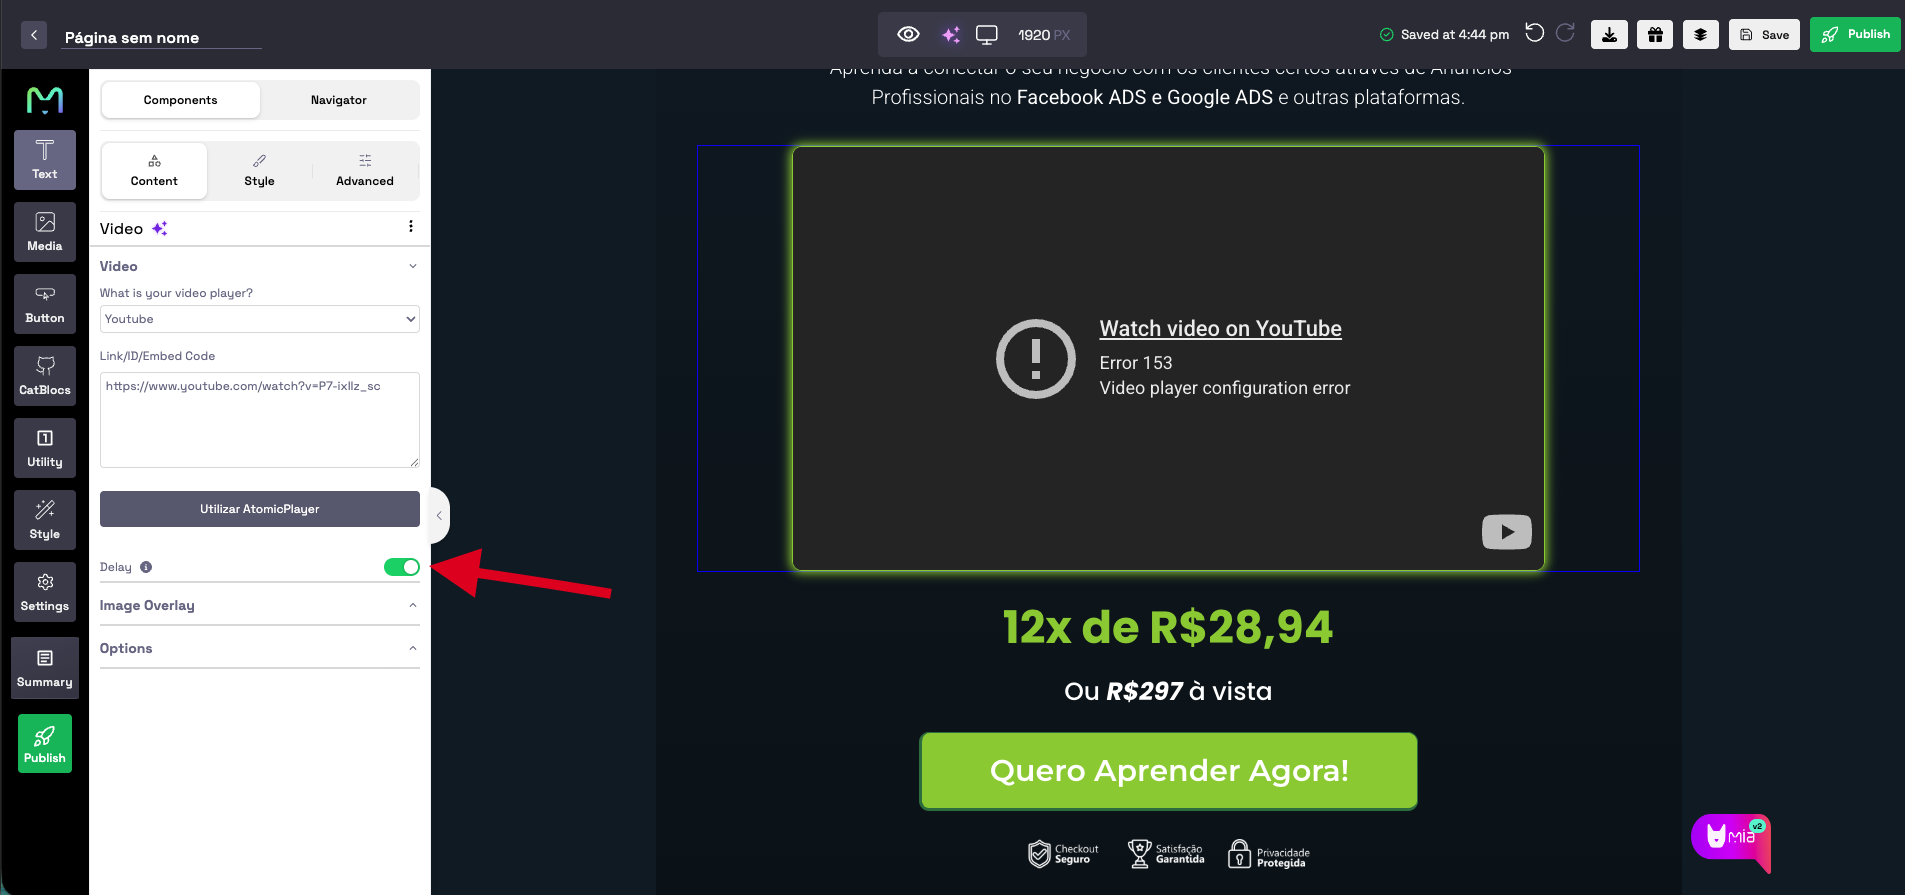
This allows the selected video to control when delayed sections and elements appear.
Step 4: Apply Delay to an Element or Section
Select the button, offer, pricing section, testimonial block, or any other element that should be hidden at first. Open the Advanced tab and enable Show after page delay.
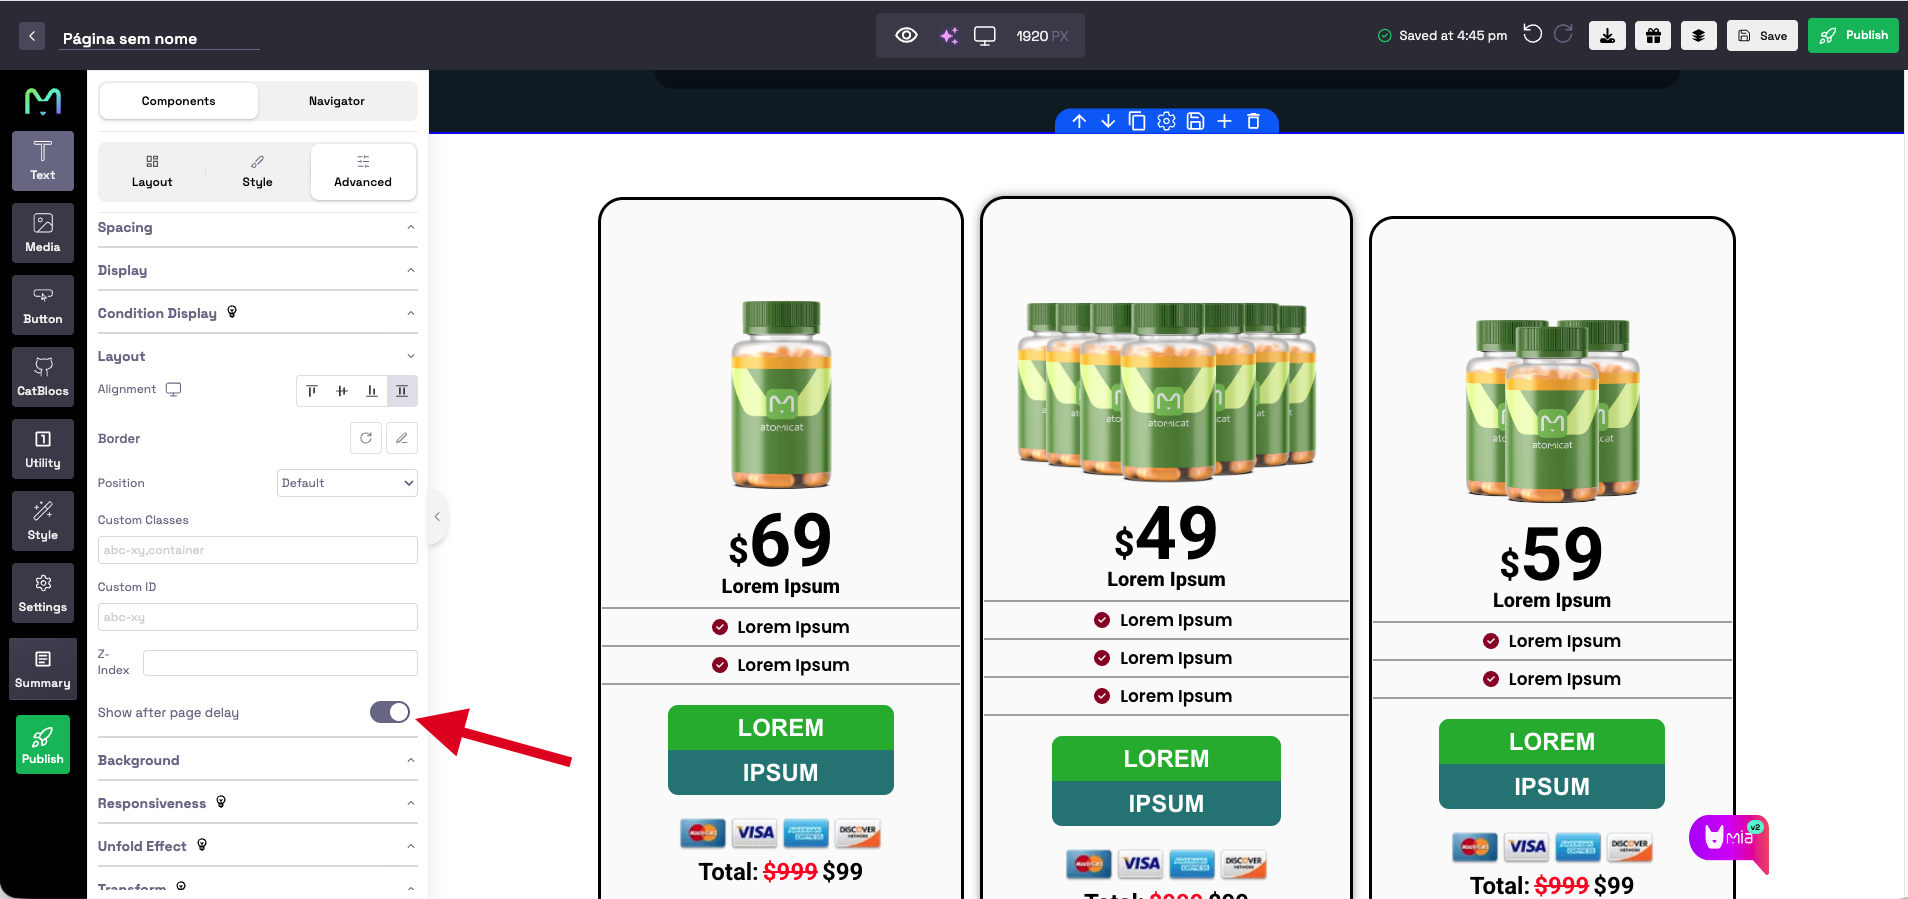
Repeat this for every element or section that should appear after the configured delay.
If several elements should appear at the same time, place those elements inside one section and enable Show after page delay on the section. This is easier to manage than applying the delay to each element separately.
Common delayed elements include:
- CTA buttons.
- Pricing sections.
- Offer boxes.
- Bonus sections.
- Testimonials.
- Checkout buttons.
Step 5: Save, Publish, and Test
After configuring the page delay and delayed elements:
- Save the page.
- Publish the page.
- Open the preview or live URL.
- Confirm that hidden elements appear only after the configured delay.
Always test the live page after publishing, especially when using video-synced delay.
Troubleshooting
Element Appears Immediately
Check that:
- Show after page delay is enabled on the element or section.
- A delay time is configured in page settings.
- The page was saved and published after the delay was configured.
- If several elements should appear together, they are inside one delayed section.
Video Delay Is Not Working
Check that:
- Sync with Video is enabled in page settings.
- Delay is enabled on the video element.
- The correct video is being used to control the delay.
- Only one video on the page has Delay enabled.
- The visitor is reaching the configured video timestamp.
Delay Works in Builder but Not on the Live Page
Try the following:
- Republish the page.
- Clear the browser cache.
- Test in an incognito or private browser window.
- Confirm you are testing the latest published URL.
Outcome
After setup, selected elements remain hidden when the visitor first opens the page. They are revealed automatically after the configured page delay or when the viewer reaches the selected point in the video.
This helps control when offers, calls to action, pricing, and other conversion elements appear on a VSL or sales page.
Related Docs
FAQ
What is the difference between page delay and video-synced delay?
Page delay starts when the visitor loads the page. Video-synced delay reveals elements when the viewer reaches the configured time in the video.
Do I need to enable delay on the video element?
Only when using video-synced delay. Standard page delay does not require a video element to control the timer.
Can I delay more than one element?
Yes. Enable Show after page delay on every section or element that should remain hidden until the delay time is reached.
Why does my button appear immediately?
The element may not have Show after page delay enabled, the page delay time may be missing, or the latest page changes may not have been published.